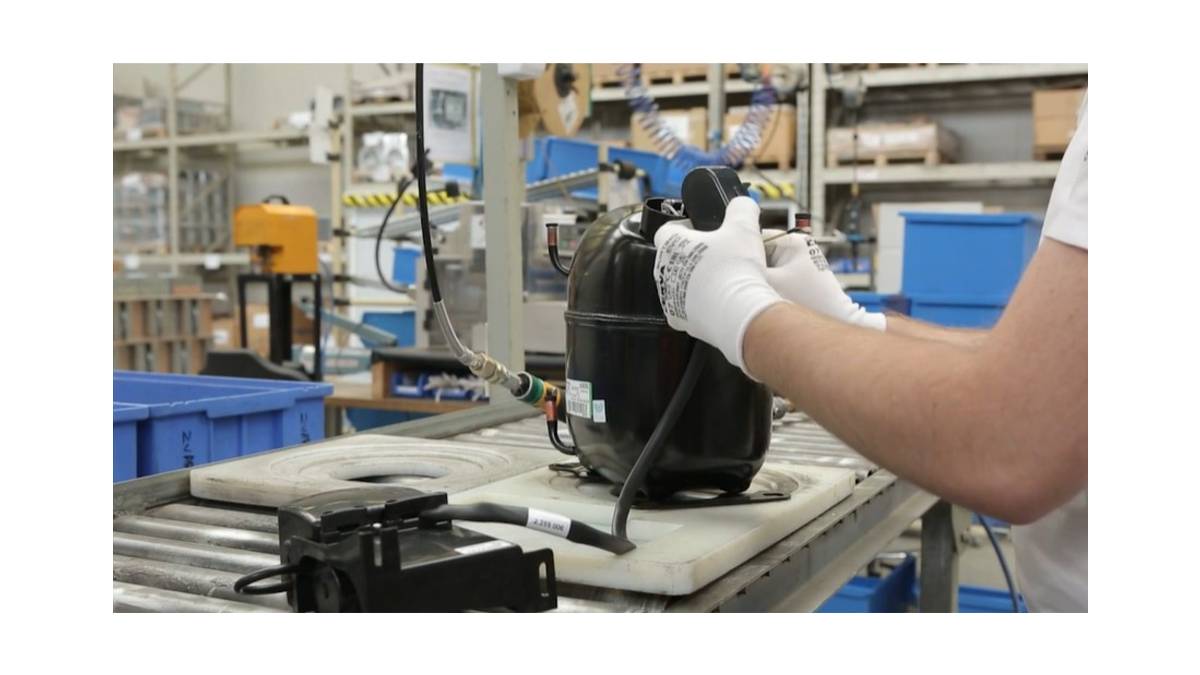
 International. To support contractors and distributors in the field, Denny Martin, technical support engineer at Nidec Global Appliance, who works with the Embraco portfolio, has put together a guide with five best practices when changing a compressor for refrigeration.
"I am sure that distributors and technicians will benefit greatly from this material that contains valuable tips for a technician to perform a quality service and avoid warranty calls," said David Ramirez, application engineer at Nidec Global Appliance, responsible for the technical support of the Embraco brand in Mexico.
5 Best Practices When Changing a Refrigeration Compressor - Practical Guide
1. Gather information and then review the entire system
Service calls should always begin with a conversation with the equipment owner to get as much information as possible about the failure.
• Was the system working well before the failure and/or were there already any malfunctions that triggered the failure?
• What is the story? Did the system work well since its installation and years later is when it began to have failures? This could indicate a lack of maintenance possibly a blockage in the capacitor coil.
• Has the system had problems since day one? Maybe the installation or application was what caused problems.
• What is the purpose of using the machine and has it been used for that purpose?
• Does the unit have a dedicated electrical circuit and if not, has any equipment been added to that circuit?
Asking a series of questions to the team owner is an easy way to spot problems. Denny says that, in his service experience, this conversation usually indicates what the problem might be and where it should be reviewed first.
Once you have information, start with a visual inspection of the system, take note of any potential safety aspects or improper location of equipment without good ventilation. Check for poor or exposed electrical connections and make sure the unit is properly grounded. This is of utmost importance when considering typical humidity and electrical conditions in the equipment environment.
Check the condition of the condenser coil, evaporator, and fans. If the unit is working, turn it on and check the voltage line and observe any voltage drop during start-up.
Generally 115 volt compressors will have start-up problems with voltage drops of 10% or around 103 volts. Measure amperage, system pressures and confirm that there is good ventilation to the coils. If you are unsure about airflow, use a piece of paper or a small cloth and watch if the airflow holds you against the coil and, if feasible, proceed to clean the coils. These simple practices will usually reveal 90% of system problems.
If you suspect a compressor is wrong, check again that the power supply is disconnected and inspect the starter components and terminal connections for arc or corrosion signals.
Occasionally, the relay can smell of burnt arcs. This could indicate a failure or a worn relay, although it could also indicate that the compressor is starting at high current due to high discharge pressure from a restricted or dirty condenser coil. Measure the resistance through the windings and compare with the manufacturer's specification sheet of that model. Readings should be within +/- 8% at 70 degrees F. Off-specification readings, open windings, or a compressor operating with no pressure difference between the high and low side indicate compressor failure.
It's easy to find a compressor that's grounded short and flips the switch but using a mega ohmmeter to test the condition of engine insulation in a compressor that seems to be working well could prevent a future ground failure and save your customer the hassle of unit downtime and burn system contamination. When choosing a replacement, if the exact model is not available, make sure that the new model is within 10% of the capacity of the original and is prepared to adjust the factory load listed on the unit nameplate.
2. Keep it clean and dry
During compressor changeover, or anytime the system is open for service, always keep copper pipes clean and dry by replacing pipe caps. Always burp the tubes after cuts, preferably with a polishing tool and not with a pocket knife. Be careful to make cuts where copper burrs do not fall into the tube, use a vacuum cleaner when entering the system. Debris in the system could end up in the capillary tube or compressor bearings if the filter does not trap it.
Remember to limit the time the system is exposed to the atmosphere, do not remove the plugs from the compressor tubes until you are ready to put it back into the system. Observe a maximum exposure time of less than 15 minutes due to the hygroscopicity of refrigeration oils or the tendency to extract moisture from the air. This moisture cannot be practically removed from the oil in the field.
Technicians generally do not pour and measure the oil into the old compressor and compare it to the specification sheet, but a difference of 2% less may indicate the need to rinse the system to remove the old oil. This oil stuck in the system will eventually return to the compressor, possibly causing a repeated failure in a short time.
A best practice during welding is to purge with nitrogen at about 2-3 PSI through the system to displace any oxygen and prevent oxides or ash flakes inside the tube. Modern cooling oils will act as a solvent and remove this contaminant from the tube where it can lodge in small holes in the system. Since tank regulating valves are not practical for this purpose, there are special nitrogen regulators.
3. Perform a leak check
An important part of the process after compressor change is leak verification. I have found it useful to simply pressurize the system with nitrogen to 75-100 PSIG and check all the joints with a solution of micro leakage bubbles, then leave the pressure in the system as long as possible and check pressure drops. After 30 minutes, if there is less than half of PSIG, you will know that the system is adjusted. A small amount of refrigerant could also be used with nitrogen with an electronic leak detector.
Some technicians prefer to use an electronic micron meter during the evacuation process to check for leaks by monitoring the increased vacuum. Once 500 microns or less have been reached, the manifold is closed with a valve and any increase in vacuum indicates that there is still moisture in the system or there is a leak. The vacuum level should be maintained once the system is dry and tight. Technicians should use the method they are comfortable with without compromising effectiveness, which means checking the vacuum level with that micron meter. A leak often means a required rework and customers don't always understand when it comes to repeating problems with their equipment.
4. Remove all gases and moisture
One of the most important parts of the process of changing a compressor is the evacuation of all gases and non-condensables from the system. Non-condensables are any gas that does not condense under normal system pressures and cause a high discharge pressure because these gases take up space in the condenser coil effectively reducing its size and capacity. This high pressure will put pressure on the compressor, leading to overwork. If that happens, the system may not be able to maintain the temperature. The only course of action is to recover and weigh a new charge of refrigerant.
After releasing the nitrogen, the system must be purged well, again with nitrogen. Nitrogen helps absorb any excess moisture in the system and expels non-condensable gases and pollutants. Always change the oil in the vacuum pump before each job. This ensures that you will be able to work effectively as the charged oil reduces the pump's ability to suck deeply.
Depending on the system and your equipment, always use the largest hoses possible. Remove the Schrader cores and they are restrictive and can seriously hinder the process. A very effective way to perform a vacuum is to remove the collector from the process using Schrader tool or vacuum valves and fixing the hoses directly between the tools and the pump. These tools have a good flow and hooking them directly to the pump can drastically reduce the extraction time achieving levels well below 500 microns.
After pulling the system down, the Schraders can be reinstalled using these tools as they have valves that prevent the system from opening. The manifold can be reintroduced into the process through these valves and a final vacuum can be made through the manifold. The final vacuum of the system should be checked with the micron meter installed in the system as far away from the pump to ensure that the meter shows the vacuum of the system and not the vacuum of the pump. Again, verify that the system is at 500 microns or less and that it stays there for 30 minutes. This low pressure in the system will ensure that the pump vaporizes and easily removes moisture, completely dehydrating the system. Any residual moisture will be trapped and retained by the new dryer.
5. Deliver the right cargo
When the system has been verified to be leak-free and dehydrated, the load must be weighed using the load indicated on the manufacturer's data plate. If the compressor model used is different from the original, this load serves as a starting point and overheating or subcooling should be used to verify that the system is properly charged.
Remember to use overheating for capillary tube devices and subcooling for TXV-equipped systems as expansion valves try to maintain the correct overheating by opening or closing the accelerator making it difficult to determine the correct load.
Overheating is used in fixed-hole systems such as capillary tubes for two reasons. First, it ensures that the system has enough refrigerant to evaporate at the right time, allowing for maximum cooling efficiency. Secondly, it confirms that no liquid returns to the compressor due to a refrigerant overload.
Not only can this liquid damage valves and bearings over time, but flooding the evaporator reduces the system's ability to do its job. Overheating is simply a measure of the heat added to the refrigerant after it has vaporized in the evaporator. Having very little overheating means that the liquid is not fully vaporizing in the evaporator and the excess liquid ends up vaporizing in the suction line closest to the compressor. Zero degrees of overheating in the suction line indicates that the liquid has returned to the compressor.
An icy suction line does not indicate a properly loaded system. Typical overheating for low-temperature systems should be 6 to 8 degrees and 8 to 10 degrees for medium-temperature systems. Small cooling systems typically have critical loads so great care must be taken to accurately deliver the correct load. Hoses should be kept as short as possible and care should be taken not to affect the collector or scale during the loading process.
When you are ready to charge, let the tank pressure equalize in the system. Be sure to charge the gas in liquid form if it is a mixed refrigerant component. The tank should indicate the correct orientation for a proper load. If you charge liquid, carefully strangle the loading valve in your manifold to ensure that the liquid is introduced slowly and has the possibility of vaporizing in the hose.
After system start-up, the remaining coolant can be accelerated. After measuring the entire load through your scale, close the manifold valve and the rest of the load hose can be let into the system. Let the system drop to the normal temperature and check for proper overheating or undercooling. Check the amplifier consumption on all motors and compressor. Once the correct operation in the system has been verified, the process tube can be crimped and welded. Schrader service valves are not recommended in small systems with critical loads.
"Following these five steps will ensure a complete compressor overhaul and help eliminate the need for a warranty call," ramirez says. "It is important, that once the system is up and running again, review with the customer the steps they took to correct the problem and offer suggestions to prevent the problem from happening again," Ramirez advises.
 * Author: Denny Martin, Technical Support Engineer at Nidec Global Appliance. During his years of experience, Martin has worked closely with refrigeration technicians and has identified the main reasons for warranty calls and best practices to consider when performing refrigeration equipment maintenance.