1.1 Wake-up call
The assembly of the floating plate that constitutes the underfloor heating, is carried out when the partitions, the frames placed, finished plastering and the chimneys in their location are already mounted.
However, floating plates can be made before the partitions are mounted. In this case, it is necessary to lay a row of bricks or a piece of wood of the width of the partition and at the height of the finished floor, to reserve the space intended for partitions.
The partitions will NEVER be placed on the floating plate, because with the expansions that it suffers when heated and cooled, they would break.
1.2 Help of plans and previous study
Specify the location of the collectors.
Fix the order of the assembly of the circuits to prevent the tubes from crossing when installing them.
Proceed to the perforation of the partitions, where necessary, for the passage of pipes, placing the pods. clean debris from the ground.
1.3 Soil preparation
The surface of the support plate (forged) should be horizontal, flat and without irregularities, perfectly clean of debris and cement and plaster sticks.
When other installations pass through the floor, check the space reserve before making the plate. ensure as far as possible, that these facilities are made glued to the partitions.
If a pipe passes through a room (for example, a central light point), rubbing on the ground will be avoided. A notch will be made on the back of the insulating box to improve its embedding.
1.4 Before laying, carefully sweep the soil

ISOLATION
2.1 Proceed first to the placement of the peripheral insulation along the partitions, walls, pillars, stairs, etc., that is, in all vertical elements that are in contact with the plate.

Do not forget to also place the hollow of the doors.

2.2 Local per local proceed then to the placement of the thermal-phonic insulating boxes THERMACOME.

Start on the opposite side of the access door by placing the plates so that they are mounted to a matajunta (Fig. 2.21).
Perform the assembly of the complete plates as indicated in Fig 2.22.
Cutting the plates can be done with a saw of fine teeth or with a knife. Adjust the boxes to the peripheral insulation.
Leftover pieces can be used for adjacent premises as indicated in Fig. 2.22.
INSTALLATION OF COLLECTORS
The collectors must be placed "compulsorily" at a higher level than the snakes of the tube, to facilitate the purging of the air from the circuits.
A 3/8" intake should be provided in the collectors to place an automatic air trap in each one.
Traps must be equipped with a shut-off valve, automatic or manual, to prevent pressure tests from deteriorating.
3.1 Location of collectors
They must be placed in areas of easy and free access. They can be incorporated into fitted wardrobes in order to facilitate the connections of the pipes. The collectors will be installed at a ground level of the order of 0.60 meters.

Collectors in cabinet
3.2 Fixation
Mount the collectors on the fixing brackets in their location, either on a partition or inside a cabinet, secured furtemente.
REALIZATION OF THE CIRCUITS
Verify the order of realization of the circuits (See 1.2). Check that the tube roll to be installed has the number of meters necessary to perform the circuit.
4.2 Make sure that the ends of the tube are in good condition. Otherwise, cut 2 or 3 cm. Use special scissors so that the cut is clean and square.
4.3 Fix the outer end of the tube crown on the valve corresponding to the circuit to be made, using a compression adapter (see order of assembly of the elements according to the lower side sketch).


4.4 The development of the tube must be carried out in the opposite direction to how it was rolled, starting with the outside of the crown.
changes of direction in the tubes are facilitated by taking advantage of the natural curvature of the tube winding. The minimum bending radius is 6.5 times the outer O of the tube. (Separation of 30 cm. between parallel tubes).
The assembly work is carried out by two operators, one carrying the roll of the tube and the other fixing it on the dice of the plates. The tube roll can be "rolled" on the ground in the direction of unwinding it.
The work can also be carried out by a single operator, but it is necessary to use a roll trolley.
In the area of curves place the staples to keep the tube in place.
4.5 Begin the placement of the tube in the room by the periphery towards the center, spacing the tubes twice the calculator separation to leave the space for the return tube (for example: for a step of 20 cm. space 40 com.).The minimum distance between tubes and interior partitions is 10 cm. and 15 cm. between the tube and the finished inner face of the outer walls.
4.6 Finally connect the end of the tube to the corresponding delentor of the return manifold.


WATER FILLING. TESTS
5.1 In order to minimize the air purge operations of the coils, slowly fill the installation.
In cold areas, with frost irrigation, use an antifreeze (glycol-ethylene in proportion of 20 ·/. 30% perfectly homegenated).
Fix the water pipe of the city network to the intake of the emptying of the low collector (open adjustment holders) and a tube (a piece of ECOTUBE, for example) to the intake of the emptying of the high collector (open valves) to serve as an evacuation to a drainage point. Open all valves to feed water to the installation.
Fill the circuits until water comes out of the drain pipe without any air bubbles.
At this time, slowly close the emptying valve and keep the filling valve open until the pressure of the network is reached in the circuit.
5.2 close the filling key and connect the test pump, overriding the automatic traps.
leave the installation with a test pressure of 10 Kg./cm2.

5.3 Check all connections, checking for non-leaks and re-tightening fittings.
5.4 throughout the assembly and until the floors are finished, maintain the mains pressure in order to detect any deterioration in the installation.
(Recommended, 3 Kg./cm.2)
REGULATION
1. Regulations
The installation of underfloor heating must comply with the regulations of Heating, Air Conditioning and Domestic Hot Water (IT. IC.).
The underfloor heating system helps to comply with the NBE CA 82 standard, "phonic insulation of the floor".

2. Plate composition
COMPONENTS CENTRAL CONCRETE PLATE PER M2 FOR CONCRETE MIXER 400 kg. 1 bag of 50 kg. Aggregates: Gravillón of 3/8 or 5/10Sand 0/5800 kg
950 Kg1.5 trucks (75 l.)
1.5 trucks (75 l.) For a cone of 5-7 com. 18 liters 4 liters 0.50 liters
3. Metal armor
When, due to the requirement of mechanical strength, it is necessary to place a metal armature on the floating plate, said reinforcement shall be placed on top of the guide dice of the tube.
Fixing staples are convenient to keep the grill in place.
4. Partitions
The floating plates are executed with the partitions mounted, the frames placed, the plaster finished and the chimneys in place.
On some occasions, the boxes can be made before assembling the partitions, but reserving the space for its location by means of a row of bricks or a wood of the width of the partition and the height of the finished floor. When the partitions are mounted, the insulation of the peripheral floor will be installed on both sides of it and throughout the height of the underfloor heating. The partitions cannot be placed on the floating plate, since the dilations of the same would cause the rupture of these partitions.
The assembly of light partitions (150 Kg./m.) is not recommended, since they destroy the phonic insulation between premises achieved with the floating plate.
On the other hand, the division between rooms, both hydraulically and thermally, is illusory to make it only for the continuous plate, when only the partitions delimit the premises.

5. Expansion joints
5.1 Joints of the support plate and the work
When there are expansion joints in the support box, they will be prolonged in the floating box and the tiling. The tubes that cross the expansion joint of the building, will be placed inside a sheath about 30 cm. long.
5.2 Expansion joints on floating plate
In addition to the diffusion joints of the building, expansion joints must be executed in the floating box whenever it exceeds 40-50 m2or when it has a length greater than 8-10 meters.
The expansion joint will be TOTAL, that is, it will completely separate the concrete plate from top to bottom.
To make the expansion joint you can place a softwood board 5 mm. thick or a polystyrene strip that can be left embedded in the concrete box.
In the floor finish with terrazzo, marble, ceramic or similar, the expansion joint of the floating plate will be extended to the finishing material, and can be sealed with silicone or similar material.
In floors finished with carpets, parquet or PVC, it is not necessary to prolong the spread, since the elasticity of these materials absorbs the expansions that occur.
5.3 Expansion joints on doors
In the doors (in all) a expansion joint will be made that separates the floating floors of one room with another.
6. Plate thickness
The thickness of the plate is a function of the level of obtained and the coating to be placed, but it will never be less than 55 mm. counted from the surface of the insulation, for ceramic coatings and 65 mm. for gluing (See Lower sections).

Section of a support board
7. Assembly
The concrete of the floating plate should not be poured until the tightness test has been carried out and the appropriate pressure is maintained to full satisfaction.
During the pouring of concrete, the tubes will be filled with water and with a pressure of 3 kg./cm2. the pressure shall be maintained until the total completion of the soil.
All possible precautions will be taken against possible deterioration against frost-related damage, and a mixture of water with 15-30% ethyl-glycol should be used. The mixture will be perfectly homogeneous.
the start-up of the installation will be done progressively, following the prescriptions given on the next page.

FLOOR COVERING
It is necessary to ensure that the thermal resistance of the coating does not exceed 0.15 m.2/W. ºC. The heating must be operated before it is placed (see subsequent paragraphs of minimum duration) in order to ensure maximum evaporation of the floating box.
The placement will be carried out after 8 days of heating of the box.
It can be placed either on tiles or in strips.
The fixing shall be carried out only by means of the neoprene glue or similar in accordance with the instructions of the manufacturer of the coating.
Carpet
Heat the box for 8 days to evaporate the water well. The carpet must be less than 10 mm thick.
Choose a brand of carpets that indicates the thermal resistance of the product.
Carpets with coating, bituminous bottom, rubber, cellular matter, or synthetic resins should not be placed.
The tapestry should be glued completely on the entire surface leaving no air pockets between the carpet and the concrete box.
Wooden parquets
Heat the plate for 15 days.
After 8 days store the parquet in the premises where it will be installed.
Only glued parquet can be placed; for example: mosaic type or dominoes.
Maximum thickness 10 mm. preferably of hardwood.
Avoid solid packages susceptible to cracking. use an irreproachable parquet coal, following the manufacturer's instructions.
These materials are the ideal coating for floor heating. They can be glued if they are of small thickness, but they are usually placed with mortar.
Important points
The thickness of the laying mortar can vary in the limits from 1 to 3 com. at the most.
Areas exceeding 60m2must be divided. Very long lengths should be divided into sections of 8 meters.
this fractionation will be carried out in the mortar and in the tiling and will be coated with moldable or semi-rigid materials.
access to the premises must be prohibited during the laying of the cladding and for the next three days.
Costitutive elements of the low temperature underfloor heating system
Plastic tube
It is a high density polyethylene tube, cross-linked by ELECTRON RADIATION. The techniques put into service for manufacturing ensure a high dimensional regularity (diameter and thickness of the walls).
 General characteristics
Characteristics Unit Value Standards Volumetric mass 0.944 g/cm3 NFT 54002 Thermal conductivity 0.35 W/K DIN 56612 Expansion coefficient 1.90 mm/m.k DIN 53752 Fire classification M 4 - CSTB Elongation at breakage 375 % NFT 51034 Heat contraction 1.3
100 mm/mm
%
MPA
ATEC
of
CSTB.
Dimensional characteristics
DN Ext. tube mm Trade description mmxmm Wall thickness mm Average metric mass g7m Water content dm3/KM 20 16x20 1.9(-0.+0.4) 111 05.9Presentation - PackagingThe tubes are sent in rolls of 120-100-80 meters tied with plastic tape and packed with individual cardboard on which the main characteristics of the product, diameters, length, pressure and service temperature are listed. Conditioning Length m Width tn Height m Carton - 1 Roll 0.75 0.2 0.8 Patet - 14 Rolls 1.20 0.8 1.76
Marking
The tube blue tube has a marking in Red comprising the AENOR Mark, the name of the manufacturer, the trademark, the temperature and pressure, the dimensional characteristics, the date of manufacture (week-year) as well as the metric location.
Insulation plates
The insulation plates are manufactured with expanded polystyrene. Its function in the system is:
Thermal insulation of the lower blade
Phonic insulation, dampens shock noises.
Tube support and guide. By means of the studs-guide cast in the plate itself, the tube is attached to it, being able to leave separations between tubes of 10, 20, 30 cms.
The four sides of the plate have notches along their entire length that allow them to be joined with each other rigidly, while eliminating thermal bridges.
Characteristics
Density 25 kg/m3 Thermal conductivity 0.032 W/m ºC Water vapour permeability 208 micro grams/m2S Compression strength RC 89 kpa (8.9 t/m2) Phonic attenuation to shock noise 20 dB (alpha index)Measurement
Length 1 mt 0.6 m2 Width 0.6 mt Thickness 2.5 cm (3.5 cm on request)
Peripheral isolation
It is necessary to mechanically and phonically separate the base plate from the underfloor heating from the partitions. This is achieved by means of peripheral insulation, consisting of rigid strips of Expanded Polystyrene of the following dimensions:
Length 1000 m.m. Height 100 m.m. Thickness 5 m.m.Fixing staples
To attach the tube to the insulation plates, self-piercing staples are used that, nailed to the guide-studs in the curved areas of the tube, prevent it from moving from its position.
Additive for concrete
The additive fluid, a synthesis product, is a fluidizer and water-reducing plasticizer that improves the placement of concrete and increases its long-term mechanical strength.
General characteristics
Brown liquid, of approximate density 1.2 kg / l, without chloride content (less than 1 gr / l) whose main mission is to make cement more fluid, and reduce its water and air content. Standard UNE 83282.
Due to its physico-chemical action, the additive fluid allows:
On fresh concrete:
-Considerable increase in the fluidity of the concrete facilitating the placement and reducing the unit times.
-Improvement of concrete pumping.
On hard concrete:
-Increased mechanical strength.
-Increased compaciad
-Increased impermeability
The additive is compatible with all cements except aluminous.
Application properties
The use of the additive has two privileged properties:1. Improved manageability (no water reduction, with dosage of 0.5 - 1.25% cement weight)
The additive has the property of transforming a closed concrete or plastic (cone 3 to 7 cm) into a loose or very loose concrete (from 15 to 20 cm), preserving its strengths.
Concrete is placed very easily with a slight vibration. If this vibration is not made it is necessary to carefully chop the stone.
2. Improvement of resistance and manageability (with water reduction between 5 to 10% with dosage of 0.75 to 1.5% of cement weight).
The additive also allows to improve the placement of the concrete and allows at the same time to increase its resistance (15 to 40%) by association of the two effects.
Curve 21 concrete with 1.5% additive fluid
Curve 22 concrete with 0.5% additive fluid
Curve 23 concrete sample without additive

How to use
1. Dosage: 1% by weight of cement.
2. Improved manageability:
The additive has the maximum efficiency when it is introduced into the concrete together with the water of the dough.
We recommend the following forms of use:
Works and prefabricated
-Preparation at the plant
Since the last cubic meter has been poured into the truck, stop the turn of the concrete mixer and introduce the additive with the desired dosage, directly on the concrete.
The transport of the concrete will be done without rotation in the concrete mixer.
Upon arrival at the work, the concrete mixer will start at high speed for a few minutes before casting it on the formwork.
preparation of the work
The additive is added to the concrete but with reduction of the water of the mass of 5 to 10%.
Presentation - Storage - Packaging
Plastic bottles of 20 liters.
limit of use: 2 years after the date of manufacture.
The product can freeze at low temperature (from -2 ºC), but once thawed it recovers its original qualities.
If the storage temperature is high, avoid all evaporation by checking the hermetic closure of the bottles.
Precautions
Non-hazardous handling
In the case of contact with the skin, a simple wash with water is enough.
Distribution sets
The different circuits formed by the cross-linked polyethylene tubes are attached to a one-way and a return collector (see fig1.)

fig1.
fig2.
The Ecotube is attached to the one-way manifold by means of a adjustment valve equipped with fitting-adapter. The return collector is joined by means of a holder with its corresponding fitting.
Each collector can be equipped with a shut-off valve (see fig 2) (ball) and with a Te-terminal for the placement of an automatic trap and a draining tap.
The collectors are fixed to the wall by means of metal supports, and will be installed at a height of the ground not less than 50 cm.
The collectors can be supplied from 2 to 11 mouths and from 1'' and 1/4 in diameter.
Temperature regulation and safety
Regulation
In low-temperature underfloor heating installations, there is a very close relationship between the temperature of the water, the indoor and outdoor environment.
For being very low the  t between the temperature of the water and the environment, any modification in the temperature of the water generates a modification in the emission of heat from the radiant plate of the floor.
For this type of installation, the best regulation is based on maintaining a water temperature as a function of the outside temperature to keep the ambient temperature constant.
This is achieved with an automatic regulation system by means of a motorized valve of 3 or 4 ways sent by an electronic control unit that receives signals from an external probe, a water probe (in the circuit to the underfloor heating) and, optionally, from a probe in the environment.
Safety
The safety system must cut off the circulation of water if due to a failure of the regulation installation, the water temperature exceeds 60ºC. This is achieved with a thermostat, installed in the pipe, regualdo at 60ºC, which stops the pump if this temperature is exceeded. An anti-return valve will also be installed to prevent gravity heating.
APPLICATIONS
Principles
Underfloor heating at low temperature. It is a method of heating by radiation, which uses as a heat transfer fluid, circulating through a coil of high density polyethylene tubes, cross-linked by electron radiation, embedded in a concrete plate, which constitutes the temperature emitter.
Applications
As a total or partial heating system
In HOUSING, both individual and collective.
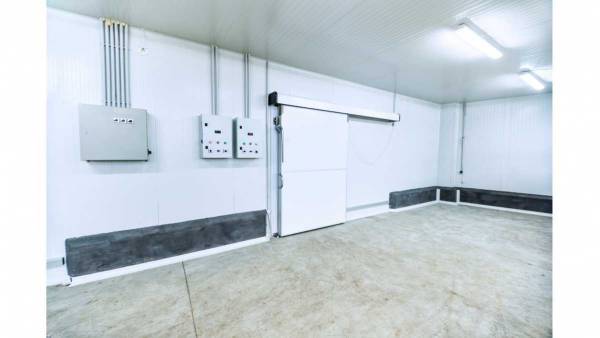
In COLLECTIVE BUILDINGS: offices, factories, schools, nurseries, nursing homes, churches, etc.
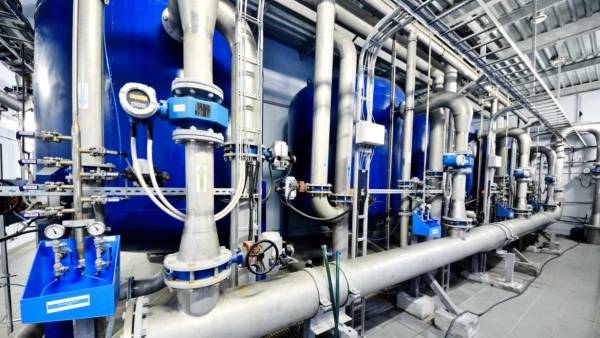
In SPORTS COMPLEXES: gyms, indoor tennis courts, swimming pools, sports centers, etc.
Outdoors, as anti-ice in parking, pedestrian areas, access ramps stairs, etc.
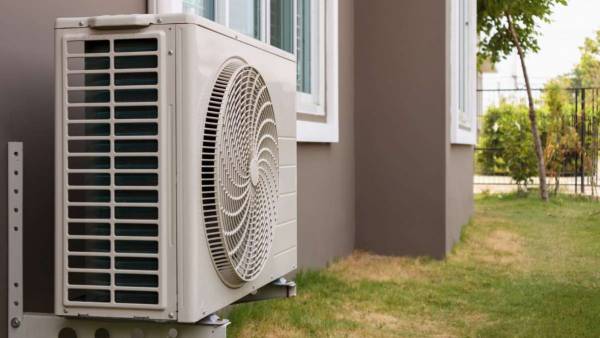
Energy sources
Taking into account the low temperature of the water that circulates through the tubes, (normally projected with a one-way temperature of 45ºC), the energy sources to be used can be any of those used in the other heating systems: Heat pump, Solar energy, Geothermal energy, water recovery in industrial processes, diesel boilers, gas, charcoal, electric.
In a low-temperature underfloor heating installation, you can switch from one heat generator to another (from coal boiler to caor pump, for example), without the need to modify the elements that are part of the underfloor heating system.
Advantages
Figure 1
The sensation of "comfort temperature", which the human body perceives, is not the one that can be measured with a thermometer (which will measure the ambient temperature), but the arithmetic mean between the ambient temperature and the average temperature of the surfaces surrounding the body.
This allows us to ensure that the body perceives a feeling of COMFORT, with an ambient temperature of 17-18ºC, when 20-21ºC would be necessary to obtain the same comfort with other heating systems (radiators, hot air, etc.).
The decrease in ambient temperature leads to an energy SAVING of 5% for each degree, which allows us to talk about savings of 15% for underfloor heating installations compared to traditional systems, at equal time and temperature of use.
With the underfloor heating, an optimal distribution of the temperature is achieved in the area we want to heat. The hottest area is that of the feet, and as we move away from the ground, the temperature drops. It is the ideal system for heating high premises, such as churches or sports halls, etc.
By not reheating the air, practically the relative humidity is not modified.
Because the difference between the temperature of the soil and the environment is very low, the movement of air by convection is almost zero, which facilitates the non-accumulation of heat in the upper parts.
Underfloor heating at low temperature, not dirty walls or takes up space 8 as radiators). It does not "hinder" the decoration of the premises.
The underfloor heating acts as a heat accumulator, which allows us to consume energy in low temperature hours, (Night rate), while we can ensure that having the generator in operation for 6-8 hours, heating is available 24 hours a day.
Once the generator is out of service, the temperature of the concrete box drops between 0.5 and 1ºC per hour, depending on the insulation of the building.